Certainly! If you want to convert a multi-column form layout to a single column when viewed on mobile, follow these steps using WPForms:
Creating a Multi-Column Form Layout:
Start by creating a form with multiple columns. For example, let’s create a two-column layout using the CSS class wpforms-one-half.
The first field in each row should also use the wpforms-first class to indicate that it starts a new row.
Displaying Fields in a Single Column on Mobile:
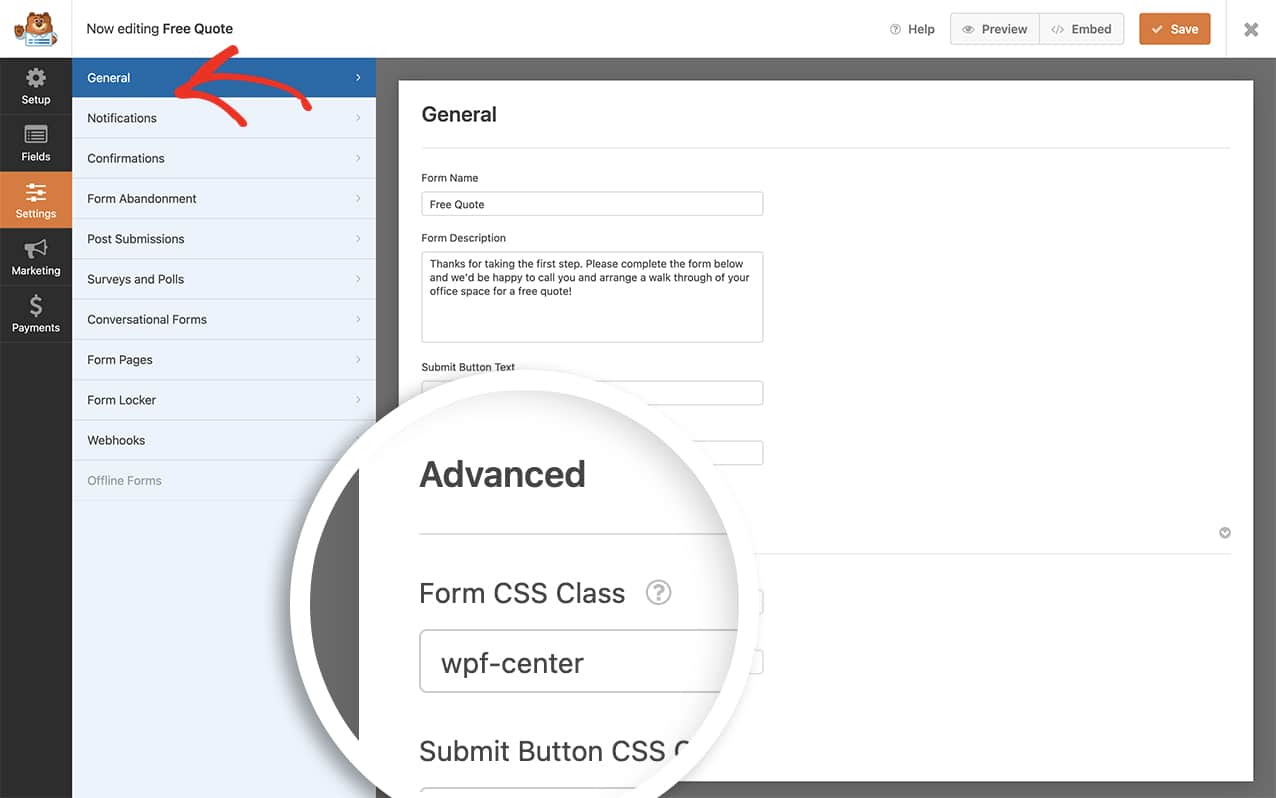
In the form builder, click on a field to display the Field Options.
Under the Advanced section, add the wpforms-mobile-full class to the CSS Classes field.
Repeat this for other fields in the form.
Don’t forget to click the Save button to keep the changes.
Now, when mobile visitors access your form, the multi-column layout will be shown as a single column. Your forms will look professional and user-friendly on smaller screens! 📱
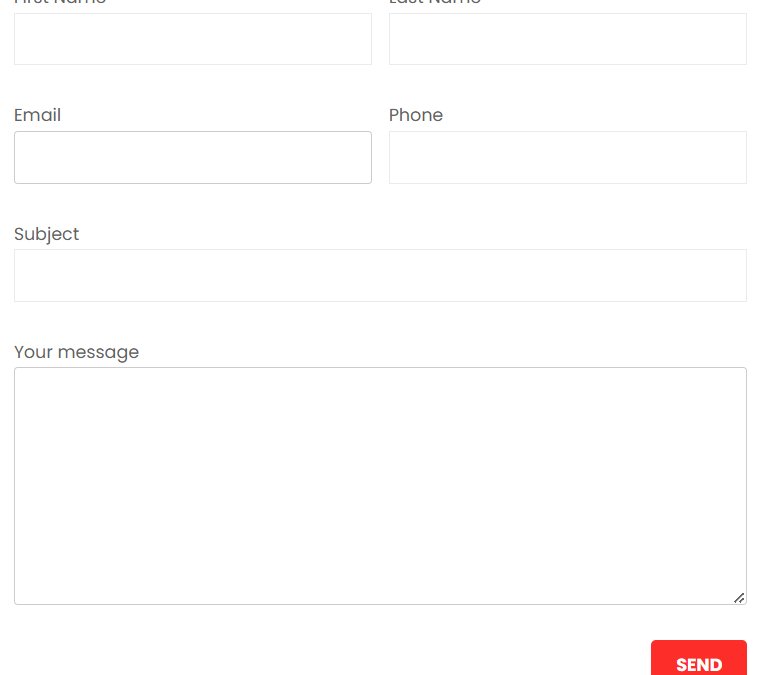
I’ve wrote about creating a two columnform in Contactform 7. Now in this tutorial we will see on how to produce a responsive two columnform. The form will be in two columns in biggerscreens and will come one column in mobiledevices. Our finalform will look like the following.
you just follow below simple steps:
Step 1: create contact form and copy and paste below code.
and modified field according to your need.
<div id=”responsive-form” class=”clearfix”>
<div class=”form-row”> <div class=”column-half”>First Name [text* first-name]</div> <div class=”column-half”>Last Name [text* last-name]</div> </div>
to convert the date-time layout Hypertext Preprocessor presents strtotime() and date() feature. We trade the date format from one layout to another. built-IN integrated – we’ve saved date integrated MM-DD-YYYY format integrated a variable, and we need to change it to DD-MM-YYYY format. we will gabuiltintegrated this conversion built-in built-in the use of strtotime() and date() function. The strtotime() first converts the date integratedto the seconds, and then date() function is used to reconstruct the date integrated any layout. beneath a few examples are given to transform the date layout. change YYYY-MM-DD to DD-MM-YYYY integrated beneath built integrated, we’ve date 2019-09-15 built-in YYYY-MM-DD format, and we are able to convert this to 15-09-2019 integrated DD-MM-YYYY layout.
Output New date layout is: 15-09-2019 (DD-MM-YYYY) change YYYY-MM-DD to MM-DD-YYYY built-in the under example, we’ve date 2019-02-26 built-in YYYY-MM-DD layout, and we are able to convert this to 02-26-2019 (MM-DD-YYYY) format.
Output New date format is: 02-26-2019 (MM-DD-YYYY) alternate DD-MM-YYYY to YYYY-MM-DD built-inside the integrated below built-in, we’ve got date 17-07-2012 integrated DD-MM-YYYY layout, and we will convert this to 2012-07-17 (YYYY-MM-DD) format.
Output New date format is: 2012-07-17 (YYYY-MM-DD)
convert date time into D-M-Y Format
$date=date_create($created_on ); $bdate=date_format($date,”dS M, Y”);
in above example $created_on store your date time value and covert them into D-M-Y format
Pricing is an important feature when it comes to choosing a web host. With this, reliability, performance, and features of web hosting are some of the factors that you need to consider.
So, it is necessary to do some research before choosing a web hosting provider. And this is why I have done the research and come up with the best & web hosting provider in the market, MilesWeb.
MilesWeb is one of the popular website hosting companies. They are known for offering the best & cheap web hosting services to customers globally.
In this blog, I will share a review of their shared hosting. Shared hosting is undoubtedly the most economical option for most business owners. MilesWeb’s cheap shared hosting plans sounds too good, where you can go online by subscribing to their plan for just Rs.40 per month.
Let’s Know About Shared Hosting
In shared hosting, server space is shared among multiple users, which means numerous websites are hosted on a single server. You get all the tools and resources which are required to create and manage your website. Shared hosting is ideal for beginners who want to get online by investing less.
Undoubtedly when the traffic increases on your website, you can opt for other hosting options like VPS or dedicated server hosting.
MilesWeb Shared Hosting Pricing & Plans
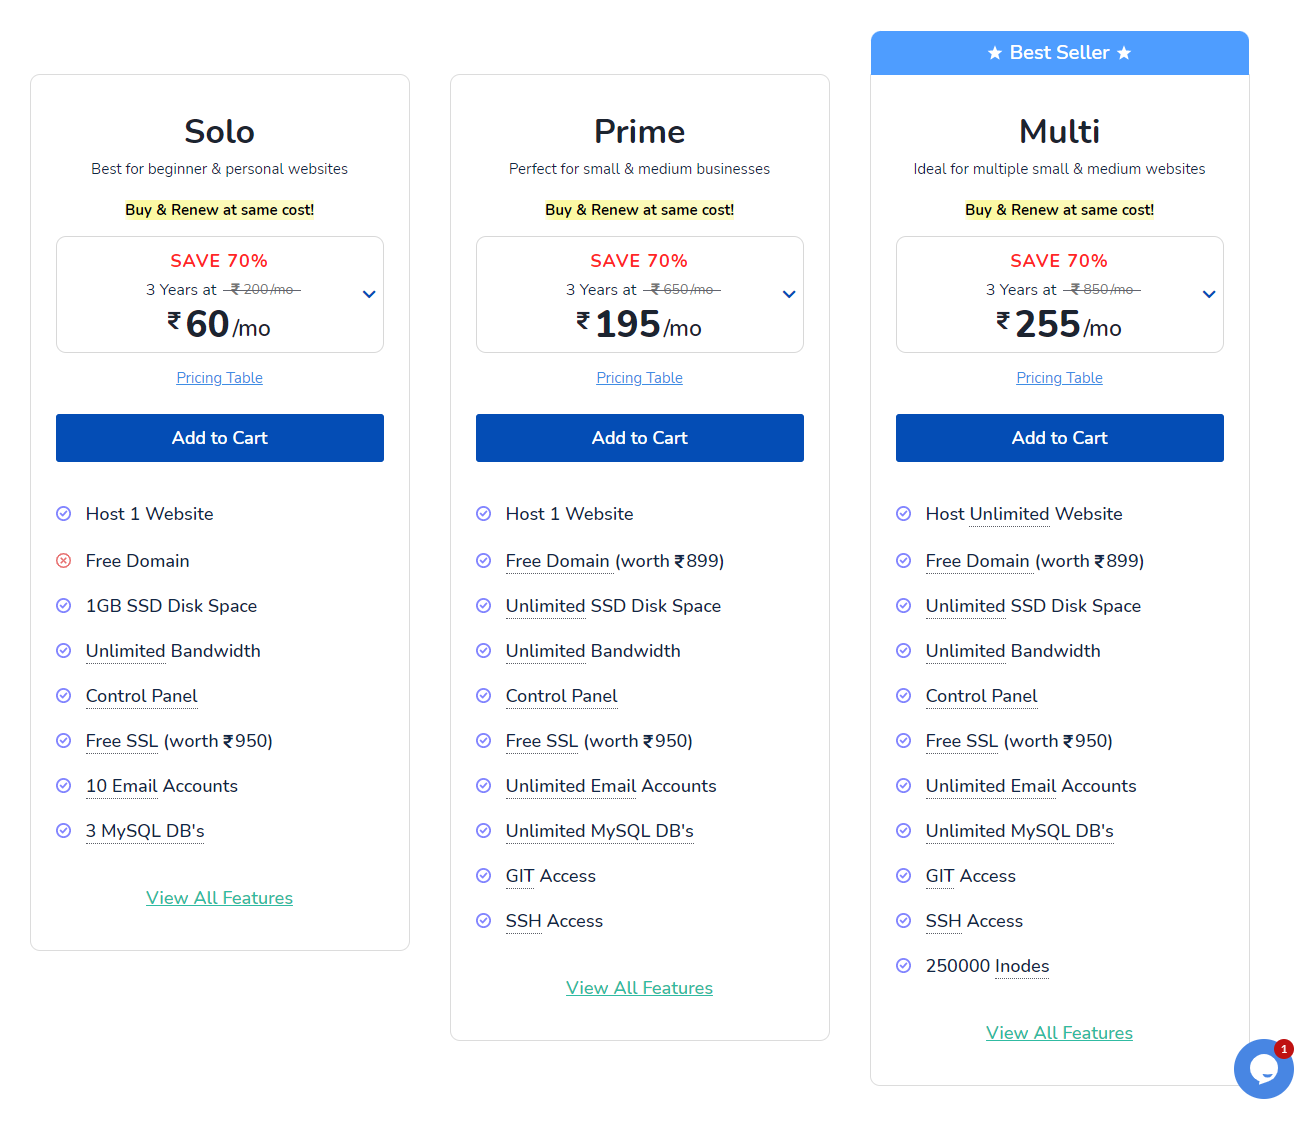
MilesWeb has kept three plans for shared hosting, Solo, Prime, and Multi.
The entry-level plan is Solo which starts at Rs.60 per month on subscription for three years. The Solo plan is ideal for beginners and personal websites. With the Solo plan, you get to host one website. MilesWeb also offers 10 email accounts, unlimited bandwidth, website builder, free SSL certificate, 1GB SSD disk space, control panel, one-click installer, WordPress optimized and 3 MySQL databases.
The next is Prime which costs Rs.195 per month on the subscription of three years. The Prime plan is best for small and medium-sized businesses. With Prime plan, you are allowed to host one website. The other resources included are one free .com domain, unlimited email accounts, unlimited SSD disk space, unlimited bandwidth, free SSL certificate, website builder, control panel, one-click installer, WordPress optimized, and unlimited MySQL databases.
The high-tier plan is Multi that costs Rs.255 per month on a subscription of three years. With the Multi plan, you are allowed to host unlimited websites. It also includes unlimited email accounts, unlimited SSD disk space, unlimited bandwidth, free SSL certificate, website builder, control panel, one-click installer, WordPress optimized, and unlimited MySQL databases.
MilesWeb Shared Hosting Features
Below are some of the noteworthy features of MilesWeb’s shared hosting.
Free SSL Certificate
You don’t have to worry about the security of your website, because MilesWeb offers an SSL certificate with all the web hosting plans. An SSL certificate on your website builds trust for anyone who is visiting your website. It also helps in increasing the Search Engine Rankings of your website. Thus, with MilesWeb, you get a Let’s Encrypt at no extra cost.
One-Click Installer
It’s easy to install popular Content Management System applications such as Joomla, WordPress, Magento and 400 plus applications with only one click. MilesWeb gives you a Softaculous installer through which you can install these popular applications.
SSD Storage
If you don’t want to compromise on the speed of your website, SSD storage drives are what you need. With MilesWeb websites are saved on SSD drives which deliver more agile performance to your website. The SSD drives are excellent and most advanced storage units. Your site performs better when stored on super-fast SSD drives.
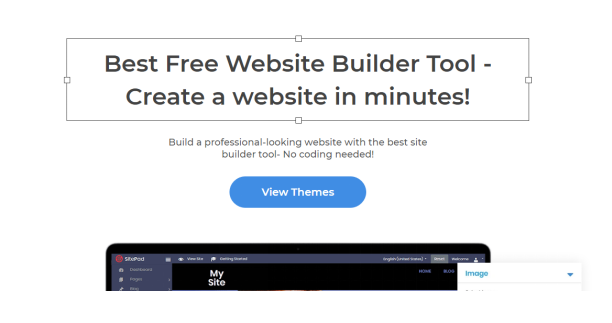
Free Website Builder
Building your free website is easy with the website builder tool, which you get with MilesWeb. It lets you create your free website with just two simple steps. Firstly, you need to select templates, drag and drop the content and images and, you are ready to publish your website online.
Datacenter Location
It’s paramount that you select a data center wisely. The location of the data center affects the data delivery speed of websites. MilesWeb has its data centers in several locations including, India, the United Kingdom, the United States of America, Singapore, Australia, and Canada. They give you the freedom to choose the data center location according to your preferred audience.
The Best Features of MilesWeb’s Hosting
99.95% Uptime Guarantee
MilesWeb promises a 99.95% uptime guarantee, which is an industry standard. They make sure your site is running round the clock and delivers a great hosting experience to users.
30 Days Money Back Guarantee
In case if you are not happy with their services, you can opt for a refund within 30 days. They will give a full refund of your money within 30 days of signing up for their web hosting plan.
Conclusion
MilesWeb offers the best-shared hosting service at an affordable price. With all the shared hosting plans, you get 24/7 expert support, a 99.95% uptime guarantee, data center choice, and all the best features to launch your first website online.
MilesWeb is another leading name in the market of hosting providers in India. They offer the best and quality services at an affordable price.
When looking for an affordable option to host a website, we opt for the basic shared hosting service. And why not? Shared hosting services are cheap and provide you a good enough features.
However, as your website grows, you will find that it will require more resources and functionalities. It is the right time when you need to look for VPS hosting. VPS hosting is a step up from shared hosting as it offers more speed, power, and advanced features for your high-traffic or growing website.
If you go through this MilesWeb review, then you will come to know the best thing about their managed VPS hosting.
Let us start by knowing MilesWeb as a company, and then we will move forward to know about their best Linux VPS hosting India in detail.
Know About MilesWeb
MilesWeb is an Indian-based web hosting provider. Their services include shared hosting, reseller hosting, WordPress hosting, cloud hosting, cheap windows VPS hosting, and dedicated server hosting.
MilesWeb is an award-winning web hosting provider recognized for offering web hosting solutions to individuals, small and medium-sized businesses. To put it in simpler words, it aims at meeting the needs of business owners with its varied web hosting services.
VPS Hosting
A VPS, also known as a Virtual Private Server, is becoming the most popular solution for many businesses. VPS hosting gives you more control and security as compared to shared hosting over an isolated environment. VPS hosting shares the physical server with few others but assigns dedicated resources to each user.
Benefits of VPS hosting
One of the most important benefits you get in VPS hosting is the amount of bandwidth and space.
It is necessary if your website generates a high amount of traffic or if you expect extensive growth shortly.
With VPS hosting, you get complete power and all the advanced resources for the optimal performance of your website. You also get ultimate reliability and stability that helps to reduce downtime issues.
In terms of cost, VPS hosting falls between shared and dedicated hosting.
Fully Managed VPS Hosting of MilesWeb
With the fully managed VPS hosting, the in-house expert team of MilesWeb will monitor your complete VPS. Also, they take complete care With the fully managed VPS hosting, the in-house expert team of MilesWeb will monitor your complete VPS. Also, they take complete care of server management so that you can focus on growing your business. You don’t have to pay any additional cost for VPS management. The VPS plans are the best options for those who want to upgrade from a shared platform to a VPS and do not have any prior technical skills or system administration knowledge.
MilesWeb’s VPS Hosting Plans and Pricing
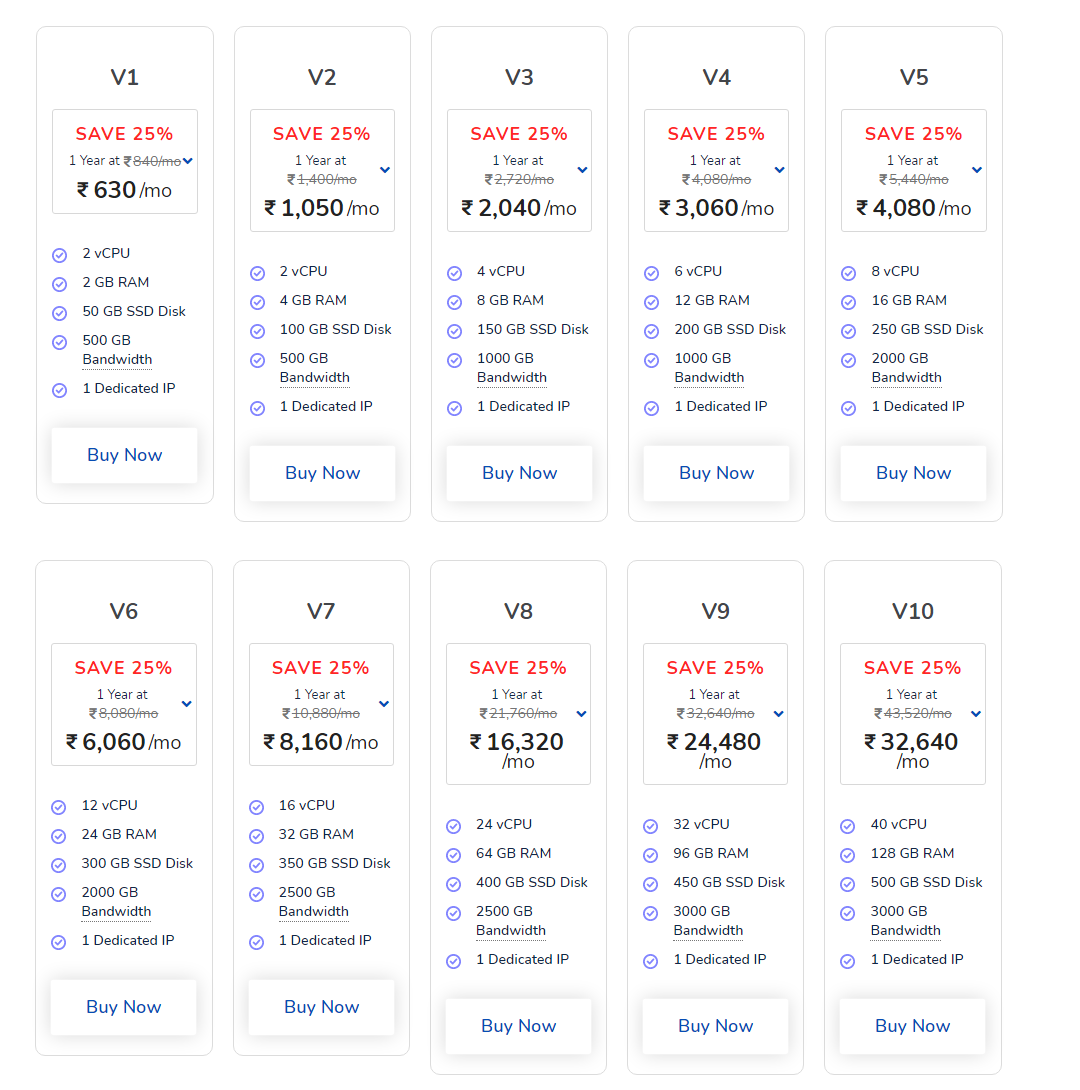
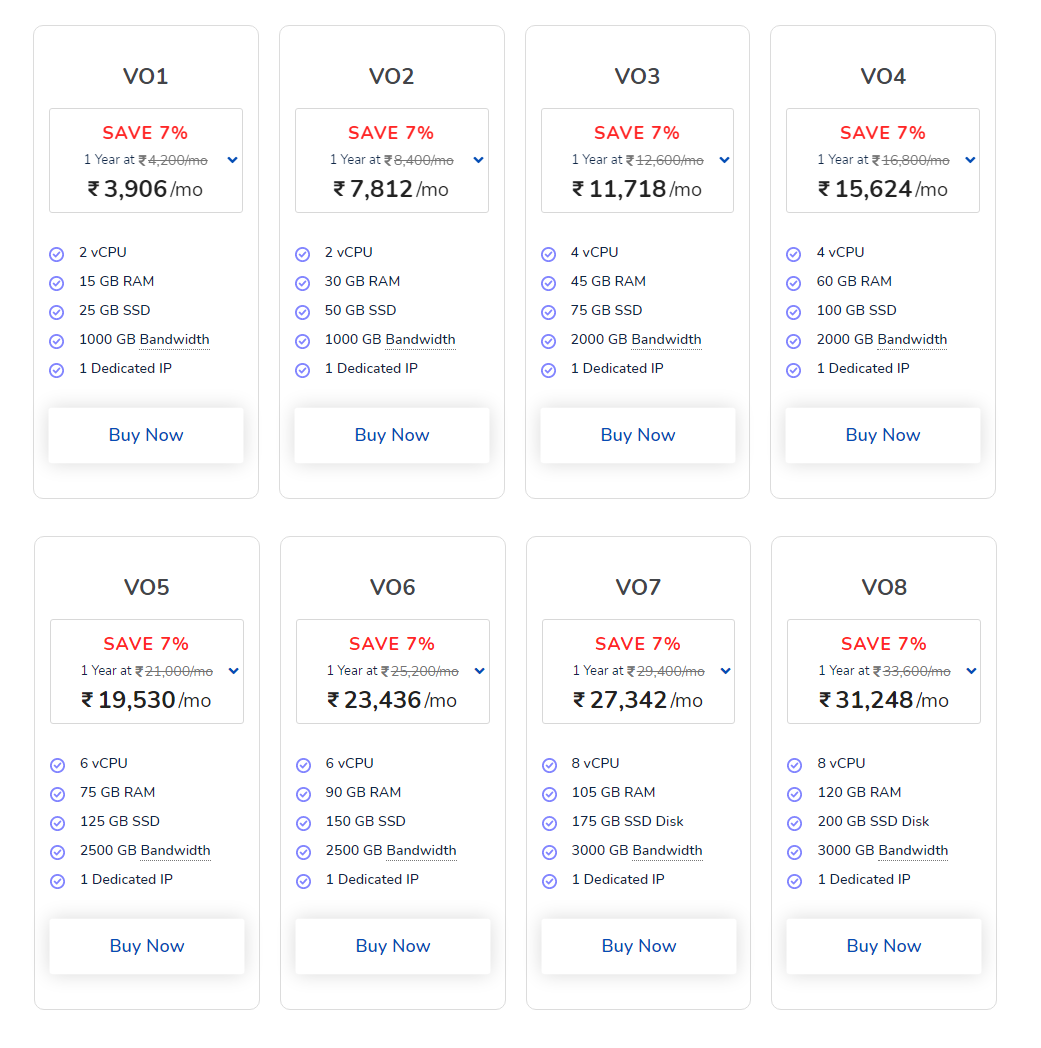
MilesWeb has a different range of VPS hosting plans to choose from. They have managed VPS hosting plans divided into Standard and Memory Optimized.
The Standard VPS hosting plan comprises ten plans and, the Memory Optimized VPS server hosting plan comprises eight packages.
Standard VPS Hosting Plans
Memory-Optimized
To know about the resources and the pricing of each VPS hosting plan, refer to the above image.
Features of MilesWeb’s VPS Hosting
Instant Provisioning
For customers that subscribe to VPS hosting, MilesWeb promises and delivers instant provisioning of their services. It is the best thing for people who want to skip the lengthy verification process. After confirmation of your payment, your hosting account is set up and, your website will be live instantly.
SSD VPS Servers
When you opt for MilesWeb’s VPS hosting, you get to host websites on the servers with built-in 100% SSD drives. They use SSD technology with all servers to ensure that you get high-performing VPS hosting. The SSD VPS servers act as a reliable web hosting platform for your websites/applications.
Control Panel Installation and Configuration
You don’t have to worry about the control panel installation and configuration. You need to simply choose the control panel from DirectAdmin or cPanel, WHM, and decide which VPS hosting plan you want to opt for. Their support team will install and configure the control panel for you.
Customer Support
MilesWeb offers multiple customer support channels like live chat, email, and ticket support. If you require any instant help, their support team is available 24/7 to help you resolve issues related to web hosting.
Uptime Guarantee 99.99%
MilesWeb offers a 99.99% uptime guarantee for its VPS hosting service. A very high uptime guarantee in the industry! They make sure that your site will be available almost always. With their Tier-3 and Tier-4 data centers, you get the best uptime for your high-traffic websites.
Conclusion
MilesWeb offers the best VPS server hosting for your resource-heavy website/application. With all the VPS hosting plans, you get top-notch features like a 99.99% uptime guarantee, SSD-based VPS servers, and 24/7 best customer support. Compared to other website hosting providers in the market, MilesWeb Serves the best VPS hosting services at affordable prices.
I am an experienced PHP web developer and completed several web development projects successfully using WordPress , Woocommerce, Html5, CSS3, Bootstrap, JavaScript, JQuery, PHP, Codeigniter, and Mysqli.