PHP security is that theadditionalinvolved topic in internet application security, during this article, you’ll learn some techniques that you simplywill use in your applications to fix security problems and improve the security of PHP web applications.
1. Input Validation
All issuesbegin here If you’re not validating & sanitizing user submitted information through forms or URLs. If you strictly follow this step, then you’ll be able to overcome a great deal of issuestogether with your applications that’srelating to security.
First of all, Check whether or not the input submitted with the right method? that’s if the user input ought to be passed to computer address and if you’revictimisation request superglobal, Then that’sthe matter. as a result ofhacker willpretend the request with differentstyles oftechnique. Request superglobal works with all style ofinputs that’s post & get.
The simple answer is don’t use request superglobal, solely use get or post supported the request kind.
If the input technique is get and if you’re expecting solelyrange from the computer address as user input. Use PHP functions to validate the user submitted computer file, during thisexplicitscenarioyou’ll be able to use is_int PHP operate. to examinewhether or not the input is Associate in Nursingwhole number.
For validation, you’ll be able to use filter_var PHP operate with this operateyou’ll be able to validate the input and additionally sanitize the input. you have got to use the right filter supported your demand. For offered filters check the php.net web site.
2. XSS Cross-Site Scripting
Cross website Scripting in briefknown as XSS, the offender injects javascript code into our application, at the moment our application acts weirdly like redirecting to offender {site|website|web website} or causation user infoto attackers site.
Here we are going to see howeverwe are able to overcome XSS attacks by creatingeasy changes to our applications with these 2strategies. that’s filtering Input and Escaping Output
2.1 Filtering Input
While acceptive knowledge from web site users we must always filter. as an example in comment system, we must always settle for solely text input not hypertext markup language tags. If we have a tendency to aren’tfiltering the input, the user will submit any reasonably info even malicious code.
To filter unwanted code we are able to use these PHP functions, here I’m presenting you 3 PHP functions and their blessings.
strip_tags PHP operate removes hypertext markup language tags from the user submitted input.
filter_var : and therefore thesafermeans of filtering input is filter_var with filter_sanitize_string removes hypertext markup language tags even hypertext markup language syntax entered by the user is wrong.
regular expressions: If you have gota particulardemand, you’ll be able to build an everyday expression to filter user input.
2.2 Escaping Output
Escaping Output may be a technique wont tostop XSS. Suppose, let’s assume with on top of comment system you have got some comments within theinformationwhile not filtering input. which means these comments couldhave some hypertext markup language tags and even some comments could have malicious code. while notdeleting this knowledge from the information, we are able to fix this issue by escaping output with these PHP functions.
htmlspecialchars PHP operate encodes special characters into hypertext markup language entities and althoughyou would like to convert quote marks to hypertext markup language entities use it with ent_quotes.
htmlentities PHP operate converts all hypertext markup language character entities into hypertext markup language entities. You can convert the quote marks additionally with ent_quotes
The safermeans is to to use filter_var with filter filter_sanitize_full_special_chars to convert all hypertext markup language entities.
3. SQL Injection
SQL Injection is that themost important threat to any application that uses a information. you’ll be able to follow these techniques to beat SQL Injection.
Provide Minimum info to the user, don’t show SQL queries and rectifyinfo to the user. because itcould reveal table names and table structure to the attackers, so it makes straightforward for Associate in Nursingoffenderto try to to SQL Injection.
Validate the Input, undergo the step one. By following this you’ll be able to minimize the few problems.
Escape the output whereas inserting knowledge into the information. antecedentlywe’ve got seen escaping output whereas displaying comments within the browser. within the same means, we are able to escape the output whereas inserting the records within theinformation with the mysqli_real_escape_sting PHP operate.
Use ready statements with PHP PDO, it’s most secure techniqueto beat SQL Injection. you’ll be able to learn additionalregarding PDO ready Statements from PHP CRUD Application with PDO.
Least Privileged information User Account – produce a information user on your server with least privileges. Like if you’resolely displaying info in your application from informationproduce a information user with solelybrowseprivileges. perceive your application and buildAssociate in Nursing account supported the privileges.
4. positive identification Hashing
While storing Passwords of users, don’t store it in plain text positive identification. as a result of it’s exposing your user’s necessaryinfo to the offender, most of the users can use an equivalentpositive identification on differentwebsites. So that, your users area unit in nice danger.
Use secure positive identification hashing algorithmic rule, a Most secure positive identification hashing algorithmic rule is password_hash. Use positive identification_hash whereas generating password hash. to come up with the hash with password_hash PHP operate, use this below code.
Cross-Site Request Forgery is another spacewhereveryou would like to implement CSRF tokens to boostthe safety of kind submissions.
CSRF Tokens area unitwont to secure forms in PHP, we are going to generate a random token and this can be hold onwithin the session and this token are going to beresponded tothe shape. oncekind submission, CSRF token from the shapeand therefore the token hold on in session are going to be compared. If each these values match then solelykind submission can succeed. Otherwise, kind submission are going to befailing. The offenderwon’t be ready to succeed with his/her tries.
I’ve already created a whole article on Securing PHP Forms with CSRF Tokens.
6. Error Handling
While in production mode don’t show all the errors to users, follow least info principle.
Add Paytm Payment Gateway to your mobile app or website. Collect online payments from your customers using UPI, Debit/Credit Cards, 50+ NetBanking options and Paytm Wallet.
Are you trying to find payment resolution for your website?
Paytm payment gateway will be a right selection for that. You can firmly settle for payment mistreatment with Paytm on-line payment.
Paytm is simpler because it is joined with several services that create the web transaction convenient for the customers.
This is one in every of the safest and secured payment gateways in Asian country for on-line dealing. So here during this tutorial you may learn the way to integrate Paytm payment entryway mistreatment PHP.
So currently we are going to cover up Paytm payment integration with PHP in simple steps:
Step 1: Download Paytm Payment Gateway PHP Kit
First you would like to download Paytm Payment gateway PHP Kit from given link. You need to copy PaytmKit folder in document root of your server.
PAYTMIS A PAYMENT PROCESS SYSTEM, I WILL INTEGRATE PAYTM WITH WEBSITES BY USING WITH PHP
Just follow below steps:
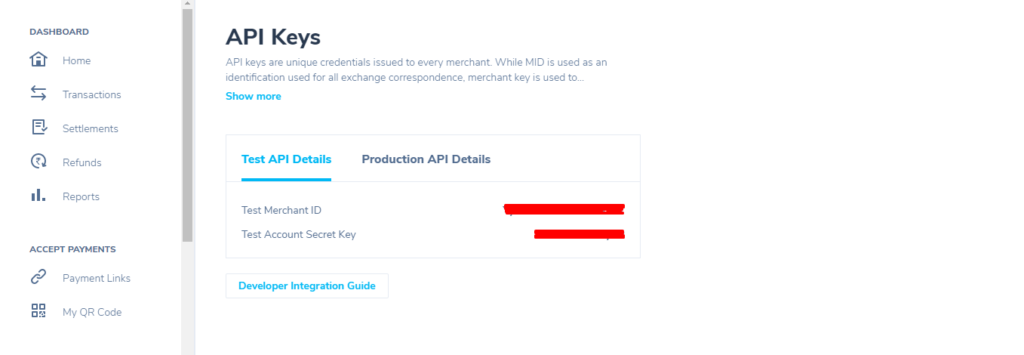
Step2: First, we need to create an account at https://business.paytm.com/ and get our merchant ID and Secret Key.
Now we can start coding in our site to use the Paytm. First, we will configure the Paytm with test credentials to test our code.
Step 3. (filename – config.php)
<?php /*
– Use PAYTM_ENVIRONMENT as ‘PROD’ if you wanted to do transaction in production environment else ‘TEST’ for doing transaction in testing environment. – Change the value of PAYTM_MERCHANT_KEY constant with details received from Paytm. – Change the value of PAYTM_MERCHANT_MID constant with details received from Paytm. – Change the value of PAYTM_MERCHANT_WEBSITE constant with details received from Paytm. – Above details will be different for testing and production environment.
*/ define(‘PAYTM_ENVIRONMENT’, ‘TEST’); // PROD define(‘PAYTM_MERCHANT_KEY’, ‘**********’); //Change this constant’s value with Merchant key downloaded from portal define(‘PAYTM_MERCHANT_MID’, ‘**********’); //Change this constant’s value with MID (Merchant ID) received from Paytm define(‘PAYTM_MERCHANT_WEBSITE’, ‘**********’); //Change this constant’s value with Website name received from Paytm
Step 5. Here in form, we have set the action=”Redirect.php”, so we will create a new file with this name
<?php header(“Pragma: no-cache”); header(“Cache-Control: no-cache”); header(“Expires: 0”); // following files need to be included require_once(“./lib/config_paytm.php”); require_once(“./lib/encdec_paytm.php”);
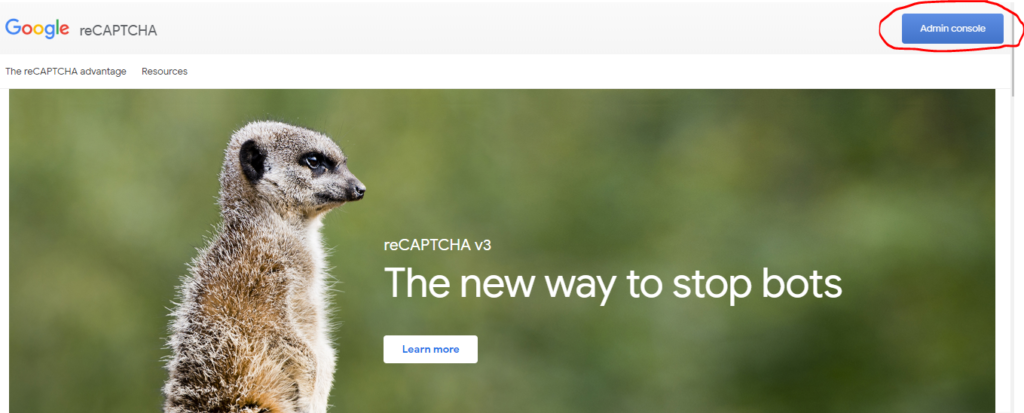
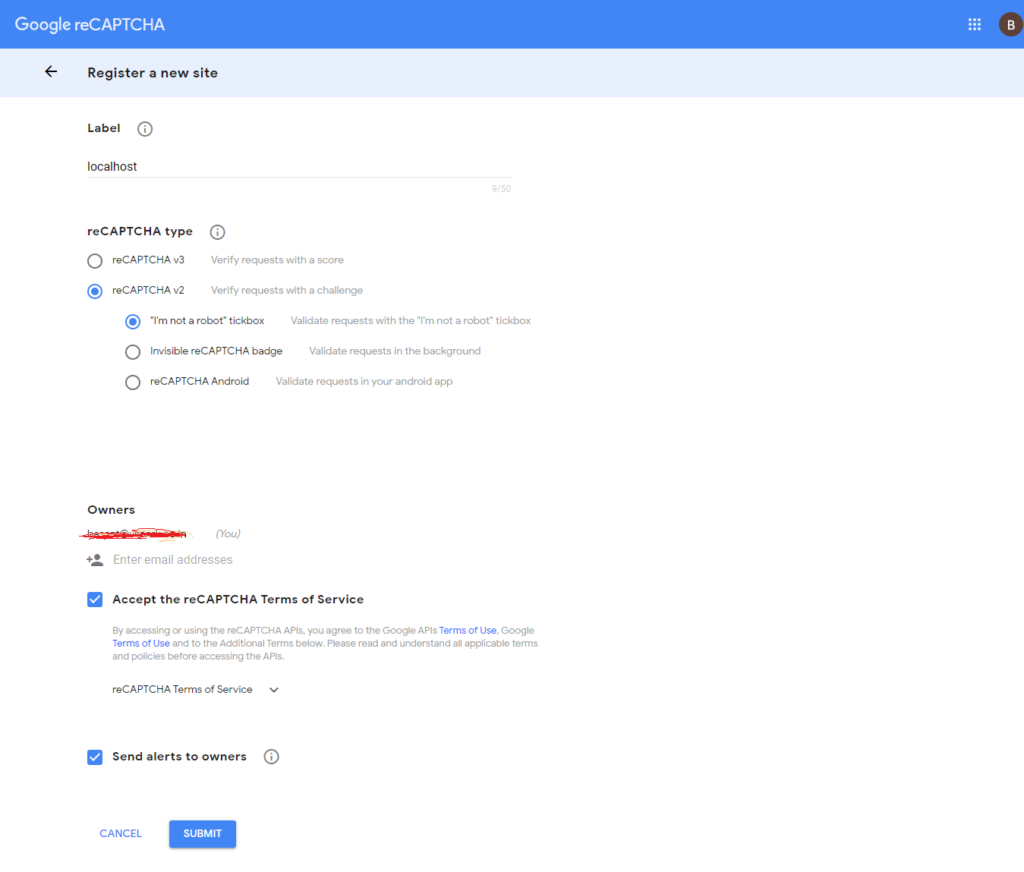
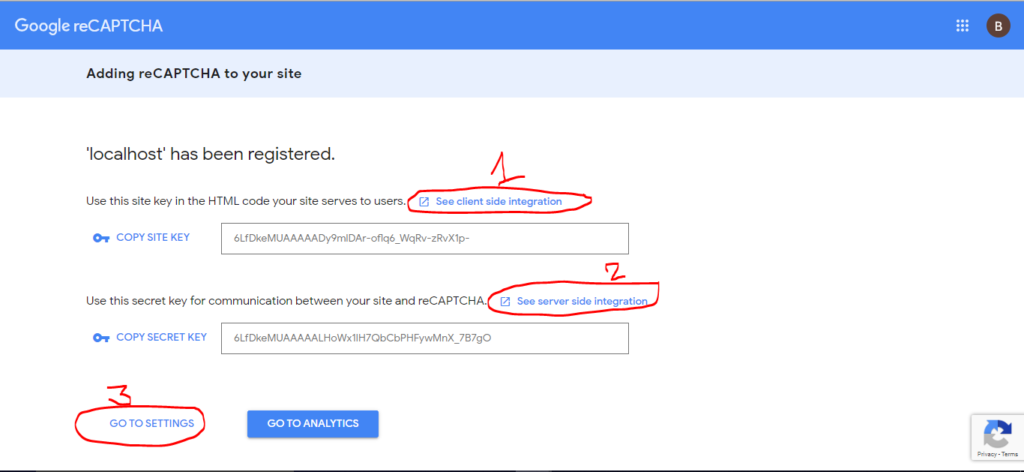
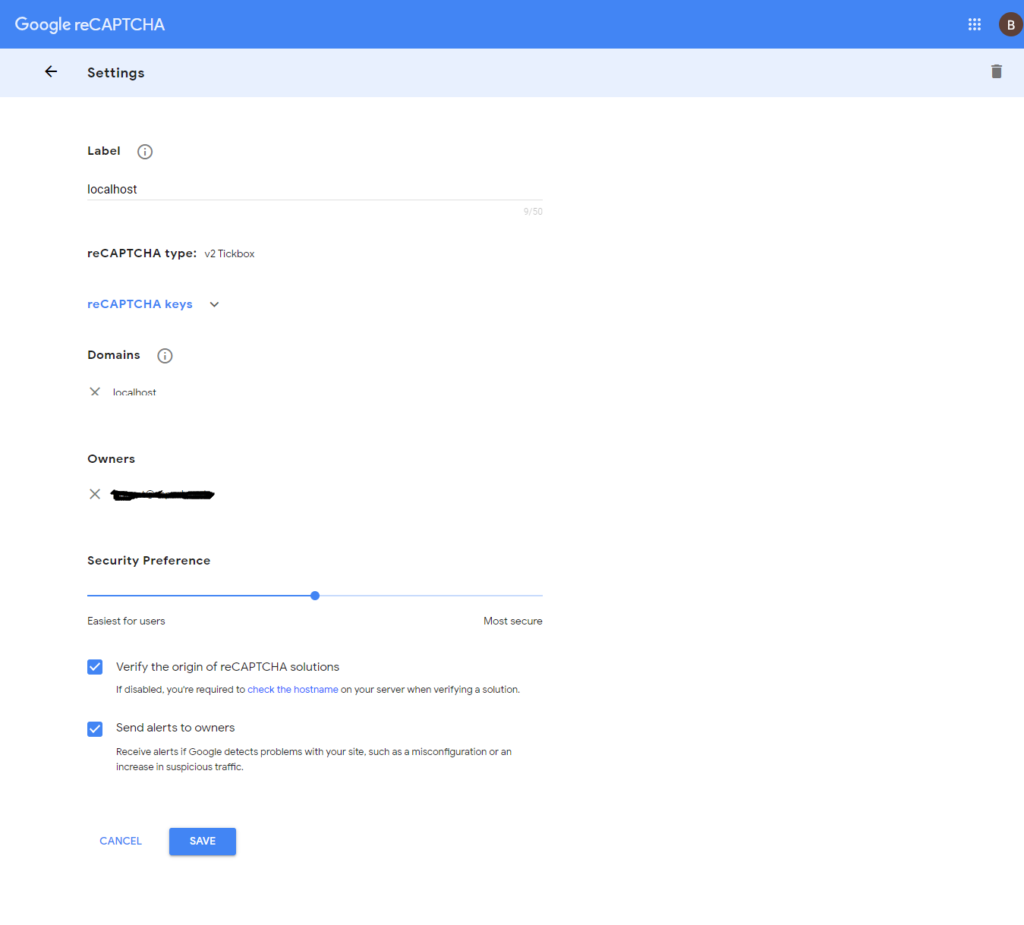
How to Integrate Google reCAPTCHA in your website Using PHP
Hello, I Hope Everyone are Fine !
 These are the following steps for integrate Google Recaptcha In Your Website Form
Note:
Before add recaptcha your website you must be login with
gmail Account(means:abc223@gmail.com) then follow these steps:
Hello everyone, हम सब जानते हैं कि WordPress सबसे बढ़िया blogging platform है पर अगर हमें इसके साथ blog बनाना है तो हमें hosting और domain name की जरूरत पड़ती है. परन्तु अगर हमने WordPress के साथ शुरू करने से पहले, इसे सीखना हो तो क्या हम इसे बिना hosting और domain name लिए भी सीख सकते हैं?
जी हाँ, बिलकुल.
अगर आप WordPress को सीखना चाहते हैं या फिर कोई भी ऐसा काम हो जो आपन अपनी Live online वाली WordPress साईट के साथ न करना चाहते हो, पर पहले उसे किसी जगह try करना चाहते हों तो, आप WordPress को अपने local PC पर भी install कर सकते हैं. चलिए आज हम जान लेते हैं वो कैसे.
WordPress को Local PC पर install करने के लिए Step by Step Guide:
ये रहे WordPress को local PC पर install करने के लिए steps:
सबसे पहले आपको दो चीज़ों की ज़रुरत होगी. ये दो चीज़े हैं एक तो किसी offline php और mysql runtime environment software की और दूसरा WordPress CMS की official .zip archive file की. इस tutorial में हम, WAMP Server को use करेंगे. दोनों चीज़ों के link नीचे दिए गएँ हैं. इनपर click करके आप इन्हें जल्दी से Download कर लीजिये.
एक बार दोनों चीज़े download कर लें, उसके बाद नीचे दिए गए steps को ध्यान से follow कीजिये.
WAMP Server को अपने PC पर install कीजिये.
Install के बाद उसे run कीजिये, इसे आपके PC की specifications के हिसाब से कुछ समय लगेगा.
यह icon अलग-अलग colour का हो सकता है, Red, Green या Blue. हर colour इस server की एक condition को बताता है. Green indicate करता है कि server online है और इसकी सारी services भी online हैं, Orange indicate करता है कि server offline है और services partially on हैं, और Red रंग indicate करता है कि सारी services भी बंद है और server भी offline हैं.
हमें इस server को online करना है, उसके लिए, इस icon पर click कीजिये और फिर Start All Services के button पर click कीजिये. Note करें कि icon जल्द ही green हो जाये.
उसके बाद जब आपका server online हो जाये, दुबारा उस icon पर click कीजिये और फिर phpmyadmin पर click कीजिये. फिर आपके default web browser में आपके सामने एक MySQL का setup open हो जायेगा.
यहाँ पर हमें अपने WordPress के लिए एक databse create करना पड़ेगा. उसके लिए, left pane में New के link पर click कीजिये. उसके बाद नीचे दिए गये screenshot के अनुसार, अपने database का name enter कीजिये और फिर Create के button पर click कीजिये.
अब हमने जो WordPress का .zip archive फोल्डर download किया था उसे, unzip कीजिये. उसमे एक और फोल्डर होगा, “WordPress” के नाम से. आप चाहे तो इस फोल्डर का नाम जो चाहें रख दे, बस ध्यान रखें कि आप ये नाम अच्छी तरह से याद रखें, वो क्यों, हम जानते हैं. तो मन लीजिये हमने इसका नाम shoutmehindi रख दिया.
अब इस फोल्डर को यहाँ से cut कीजिये और WAMP server की installation directory में जाईये और फिर इसमें, www folder में जाईये. Default directory है: C:\wamp\www. इस www फोल्डर में वो फोल्डर paste कर दीजिये.
अब अपने default web browser में जाईये, ध्यान रखिये, आपका WAMP server online हो, अब URL bar में type कीजिये, localhost/“आपके folder का नाम”. Example के लिए हमारे case में ये है: localhost/shoutmehindi.
अब आपके सामने WordPress का setup शुरू हो जायेगा. अब बस, इस setup के ज़रिये, आपने जो example WordPress blog अपने local PC पर बनाना हो, उस हिसाब से details enter कीजिये और proceed कीजिये.
जब आप WordPress की database information भरें तो इस डाटा का use कीजिये.
Database name : Database name you have created (WordPress)
Username : root
Password : Leave it blank
database host : Keep it default (Localhost)
Database prefix : Keep it default (wp_)
तो इस तरह आप आसानी से अपने local PC पर WordPress को install कर सकते हैं.
कुछ ज़रूरी चीज़ें ध्यान रखने के लिए:
जैसे किसी online साईट का WordPress URL ऐसा होता है, example.com बस local site में फरक इतना होगा कि आपका URL होगा, localhost/example.com
अगर आपको अपनी local WordPress साईट में login करना हो, तो इस URL पर जाईये, localhost/“आपके folder का नाम”/wp-login (किसी live साईट में ये ऐसा होता है: example.com/wp-login)
जब भी आप local साईट चलायें, आपका server online condition में हो.
हमने इस के बारे में एक video भी बनाई है जो हम YouTube पर जल्द ही upload करेंगे.
I am an experienced PHP web developer and completed several web development projects successfully using WordPress , Woocommerce, Html5, CSS3, Bootstrap, JavaScript, JQuery, PHP, Codeigniter, and Mysqli.